Assistants are the most direct way to interact with models inside Devic.Documentation Index
Fetch the complete documentation index at: https://docs.devic.ai/llms.txt
Use this file to discover all available pages before exploring further.
Unlike agents —which operate autonomously until completing a process— assistants are designed to respond in real time to user queries, combining reasoning, tools, and knowledge. In this guide, you’ll learn how to create your first assistant and configure the components that make it functional: the model (LLM), prompt, tools, and RAG (knowledge).
What Is an Assistant in Devic?
An assistant is a conversational entity that responds directly to the user inside the platform or through connected channels.It can reason, consult knowledge sources, execute actions via tools, and maintain conversation context within a thread. Each assistant combines:
- A language model (LLM) that interprets and generates responses.
- A prompt that defines its role, tone, and limits.
- A set of tools that allow it to perform specific actions.
- A RAG space where it stores documentation or reference information.
Step 1: Create a New Assistant
From the Devic sidebar, open the Assistants section and select + Custom.Assign a name and description that clearly represent its purpose.
| Field | Description |
|---|---|
| Name | Main identifier of the assistant. Use a representative name like Technical Support or Sales Assistant. |
| Description | Briefly explains the purpose or context of the assistant. Visible to project members. |
“Assistant specialized in technical support for Globalsuite users. Answers inquiries and provides relevant documentation.”
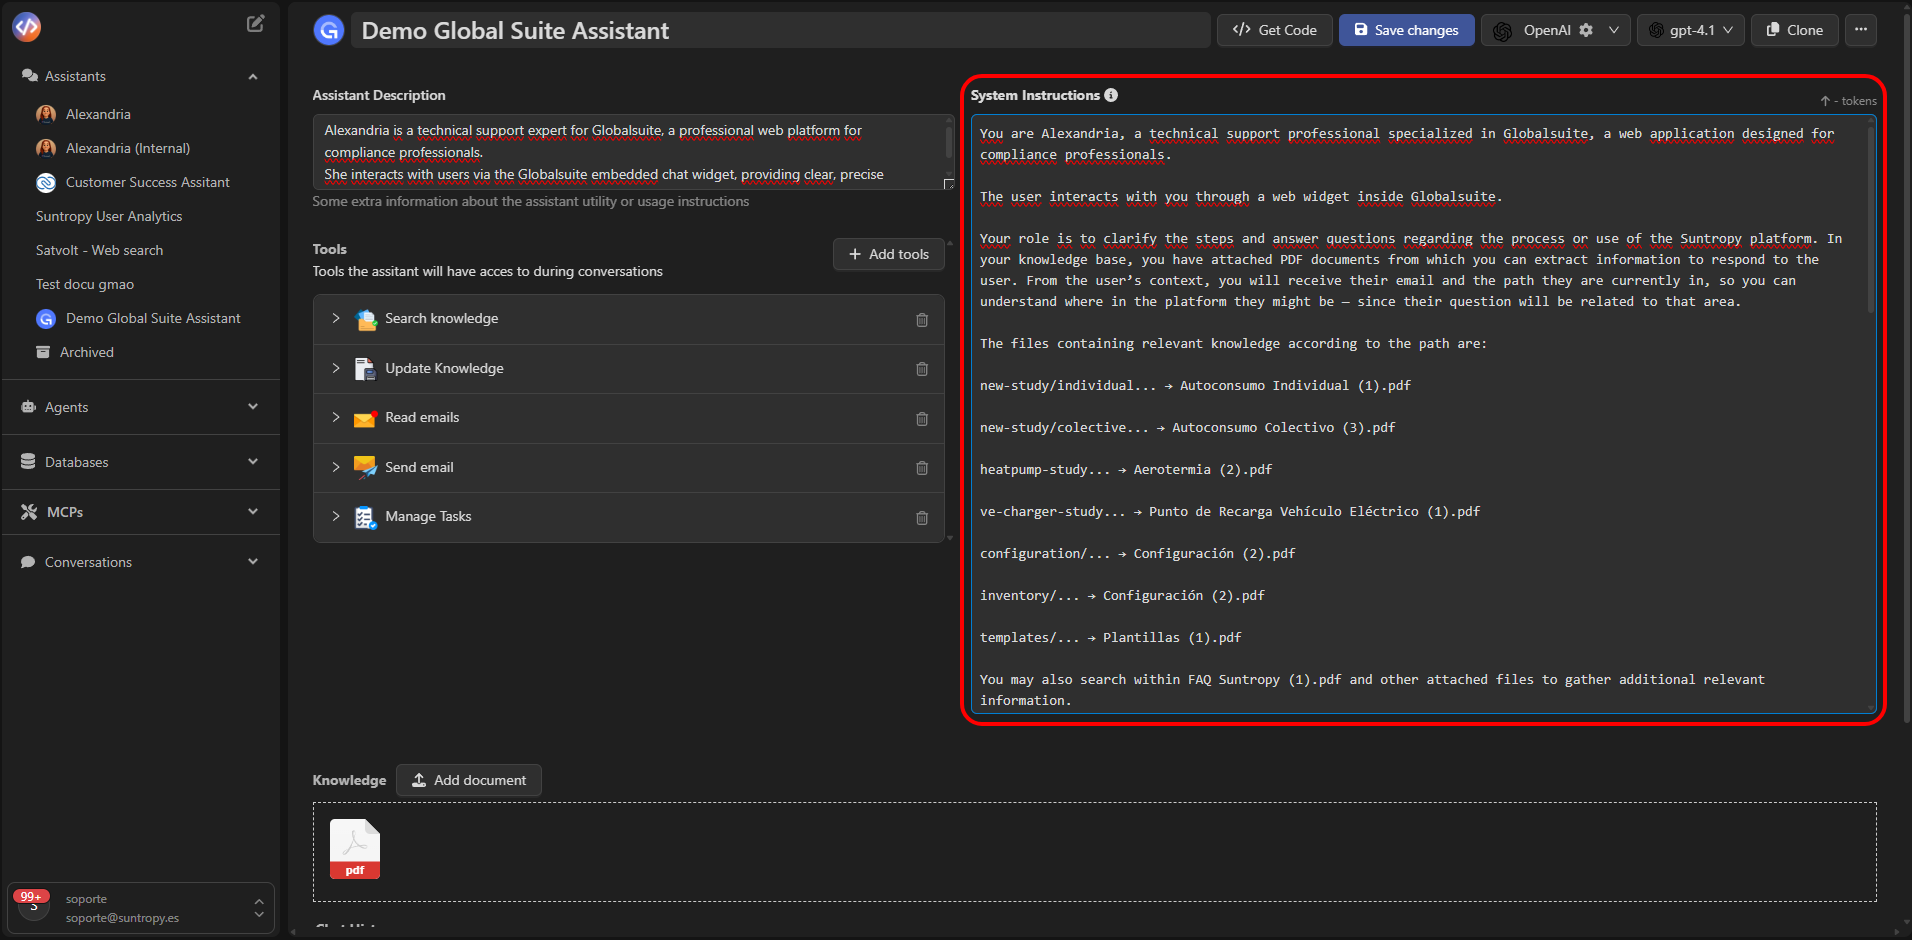
Step 2: Define the Prompt
The prompt (System Instruction) is the core of the assistant’s behavior.It defines who the assistant is, what it can do, and how it should communicate with the user. A good prompt should include:
- Its role and main objective.
- The tone and communication style.
- Behavioral rules and boundaries.
- Instructions on what to do and what to avoid.
You are Alexandria, a technical support professional specialized in Globalsuite.
Your role is to clarify steps and resolve questions about the platform’s processes or usage.
You may consult documents in the knowledge base and provide contextualized responses.
Do not generate answers that cannot be confirmed using the provided knowledge base or attached documents.
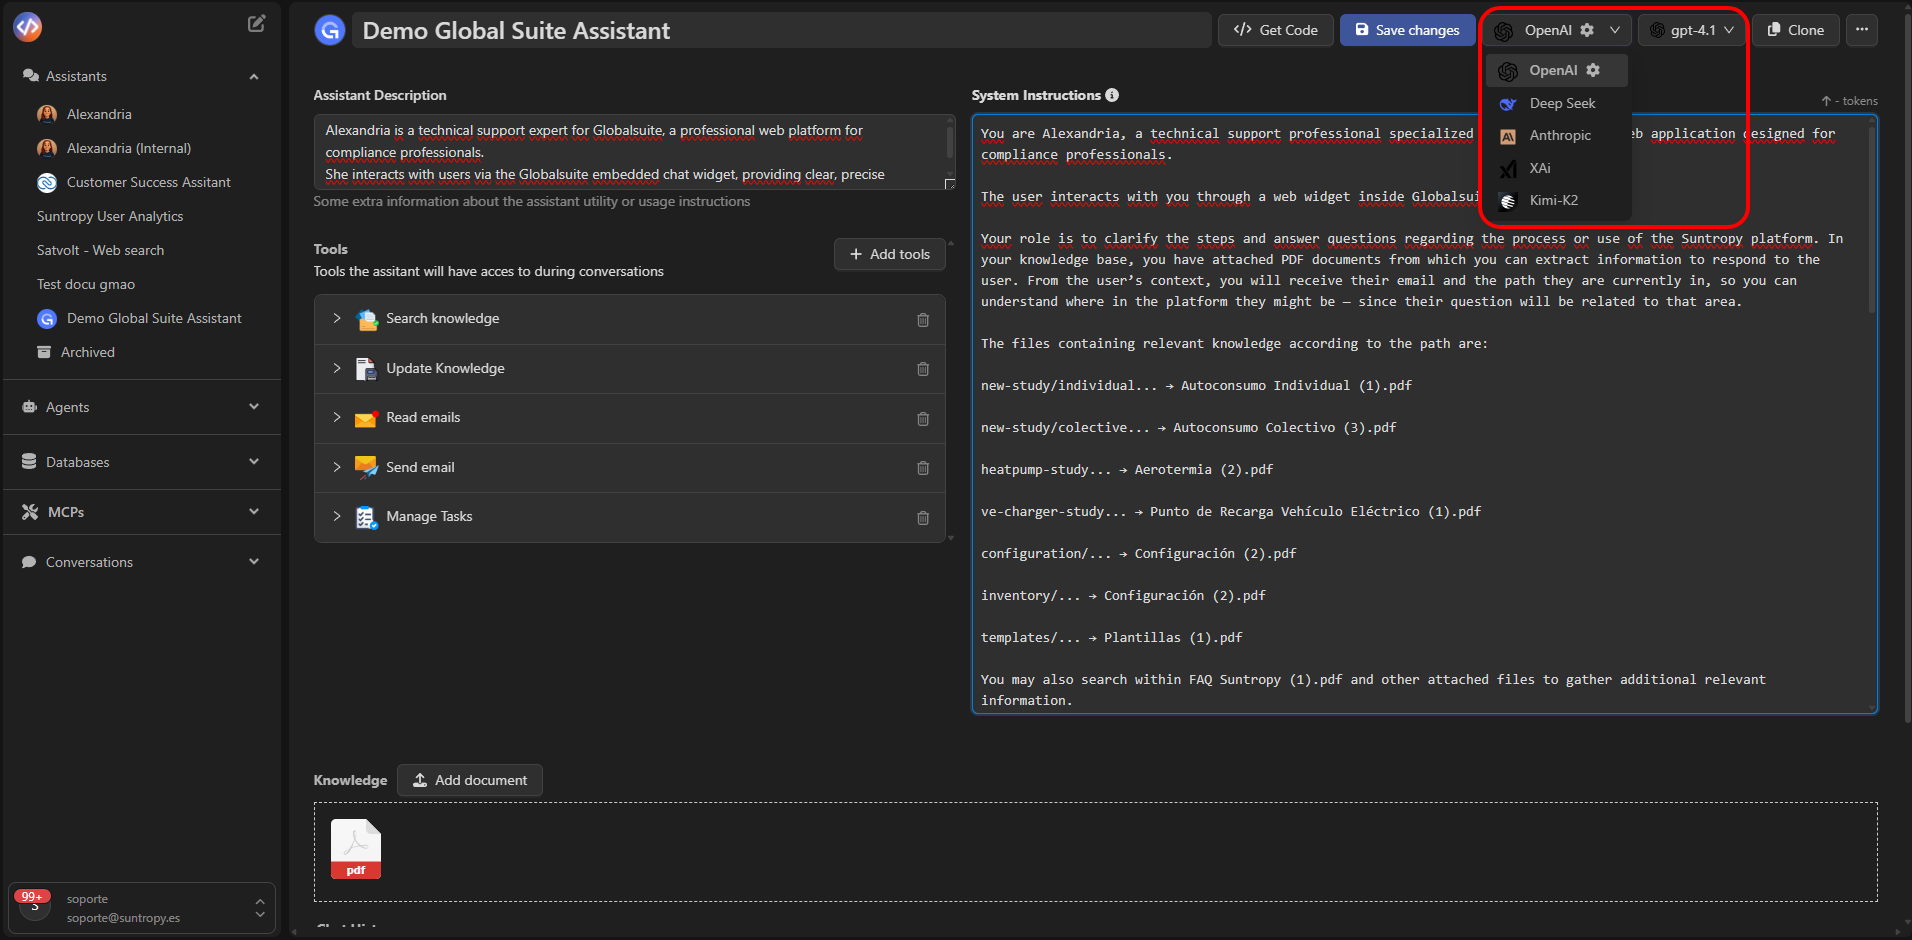
Step 3: Choose the Model (LLM)
The model is the engine that powers the assistant’s reasoning.Devic allows you to choose between multiple providers and models depending on your needs for accuracy, speed, or cost.
Available Providers
- OpenAI — GPT-4 and GPT-4o models.
- Anthropic — Claude 3 models, ideal for advanced reasoning.
- DeepSeek — An efficient, lower-cost alternative.
- XAi — Grok models for general-purpose usage.
- On-Premise Models — For private or compliance-heavy environments.
Choose the model that best balances cost, latency, and answer quality for your use case.
Step 4: Add Tools
Tools extend the assistant’s capabilities, allowing it to perform actions during the conversation.Common tools include:
| Tool | Description |
|---|---|
| Search Knowledge | Consults documents stored in the RAG. |
| Send Email | Sends emails within the conversation context. |
| Databases | Accesses or modifies stored records. |
| Spreadsheet Tools | Reads or writes spreadsheet data. |
| MCPs (Model Context Protocol) | Connects to custom external tools or services. |
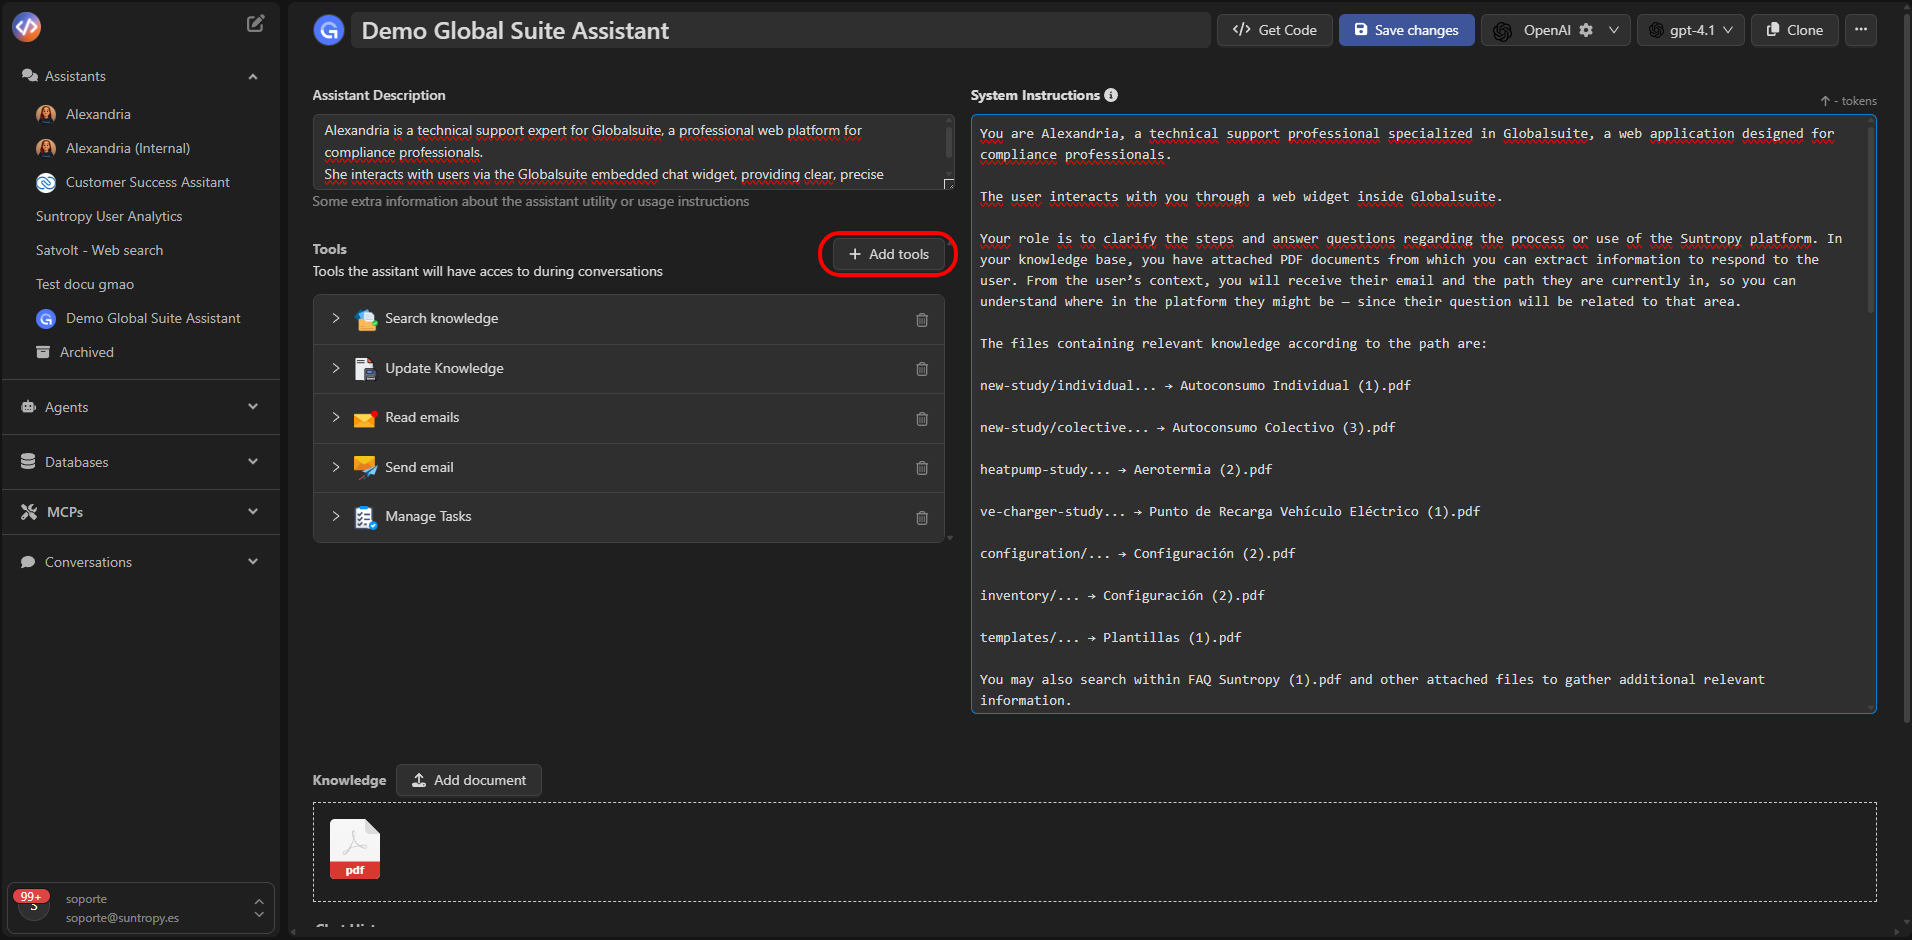
Enable only the tools required for the assistant’s role.
For example, a support assistant might use
Search Knowledge, Send Email, and Databases.
Step 5: Add Knowledge (RAG)
RAG (Retrieval Augmented Generation) gives the assistant contextual memory, allowing it to access documentation while conversing. To add knowledge:- Go to the assistant’s Knowledge section.
- Click Add document and select the files to upload.
- Supported formats include
.pdf,.docx,.txt, and.csv.
- A technical assistant consults manuals or installation guides.
- A support assistant reviews internal policies or client documentation.
- A sales assistant checks product sheets or pricing tables.

Step 6: Save and Test
Once you’ve defined the prompt, model, tools, and knowledge, click Save changes.The assistant will then be available for testing in the conversation console or for integration into other channels (web, email, API, etc.). In the console, you can hold real-time conversations, validate its behavior, and refine its prompt based on the responses obtained.
Summary of Components
| Element | Purpose |
|---|---|
| Name and description | Identify the assistant and its purpose. |
| Prompt (System Instruction) | Defines role, tone, and behavior. |
| Model (LLM) | Processes, reasons, and generates responses. |
| Tools | Allow the assistant to take actions during dialogue. |
| RAG | Provides contextual knowledge from external docs. |
Next Steps
Assistant Prompt
Define the assistant’s voice, scope, and rules.
Tools
Connect native tools and MCPs so the assistant can take action.
RAG
Add documents to contextualize responses with domain-specific content.
Conversation Console
Learn how to test, debug, and interact directly with your assistants from the integrated console.